
More About Writing Music – Processes, DAWs, gear etc.
I didn’t plan to write this post but was just finishing up some work on a song I’ve been writing for the day and saw the arrangement window of my session – thought this is something that I could write about that might be interesting.
In this instance, I’m writing in Logic Pro X. My go to DAW for recording or working on projects would usually be Pro Tools, because it’s vastly more powerful and just better, as well as being the standard DAW so projects can more easily be shared between people. However, Logic has a very intuitive UI, and although it is slightly limited in features, for writing I find it best, as its simple UI means that the writing process isn’t held back by trying to get certain things to be how you want, which can be a problem in Pro Tools due to its complexity.
With the amount of time I’ve spent writing during this lockdown period, I’ve worked on building a workflow, especially considering that I never had any sort of template before now for working in, and would spent loads of time setting up tracks, inputs/outputs and mix-buses in my session before I ever got anything done. Because of this I created a “Home Writing” template in Logic, which looks like this:
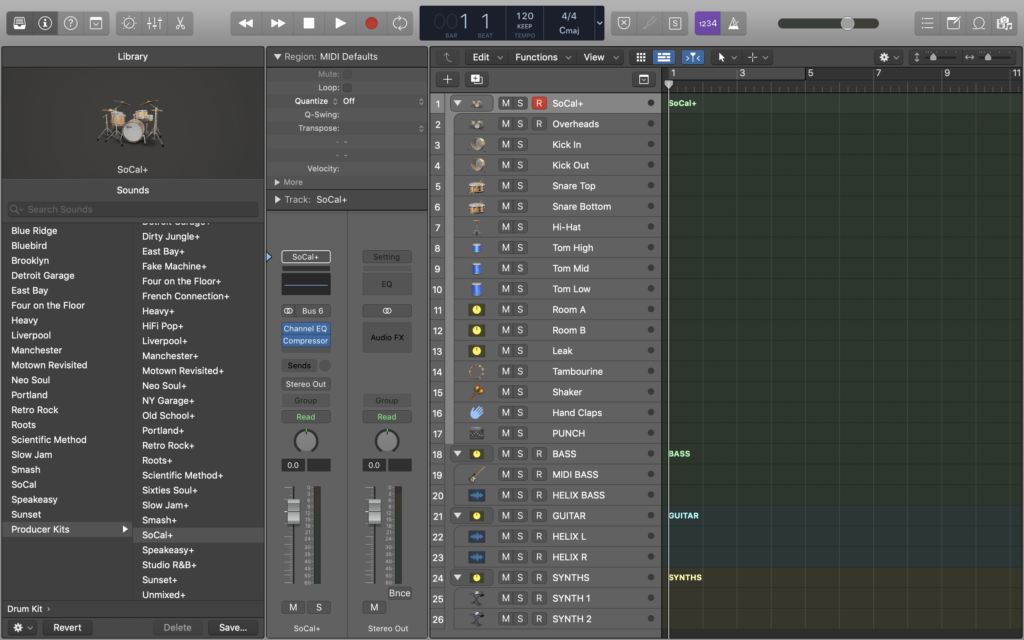
What this essentially consists of is 4 track stacks, for Drums, Bass, Guitar and Synths. The drum stack is a stock logic one – using the “SoCal+” preset, which is essentially Logic’s standard drum kit sound but in the form of what Logic calls a “Producer Kit,” creating a track stack with separate tracks for each drum and various others like Room mics and a leak track. This just gives me a lot more control over the drum sound than one of the standard non-producer kits, which just sum all of this into one track and does all the processing for you using presets. The reason I use this is because I don’t play drums, nor own a MIDI controller or drum kit, so this is the best way for me to write drum parts, giving me the most control. I input notes in the piano roll after working out what I want essentially through air drumming at my desk.
Next is the Bass stack. This consists of just two tracks – the first of which is a software instrument of a bass guitar. I don’t really play bass nor do I own one, so this is the best way for me to get a bass sound and understand what it sounds like in the song. The second track is an Audio track with the input set to the mono output from my Line 6 Helix, which I get all of my guitar and bass sounds from. This means that once the bass part is written, there is a track ready for me or someone else to record the part on a real bass.
The guitar stack just has two audio tracks, one for the left output of my Helix, and one for the right meaning I can record stereo guitar parts. In most of my projects, this stack is duplicated a number of times because, with guitar as my primary instrument, music I write often has four or more guitar parts, all of which I’ll record in stereo.
Finally, there is a stack called Synths. This is just 2 empty software instrument channel strips, ready for me to choose a synth sound I like, or any other software for instrument for that matter. It means I can quickly get sounds to put in organ or piano parts, and I’ve put a string quartet in a recent composition in this part of the session.
This template rarely ever stays the same in structure – it evolves as I work through the song and becomes more suited to the composition. Below is an example, a screenshot from the end of my writing session tonight on an instrumental song which has the working title “Wind”.
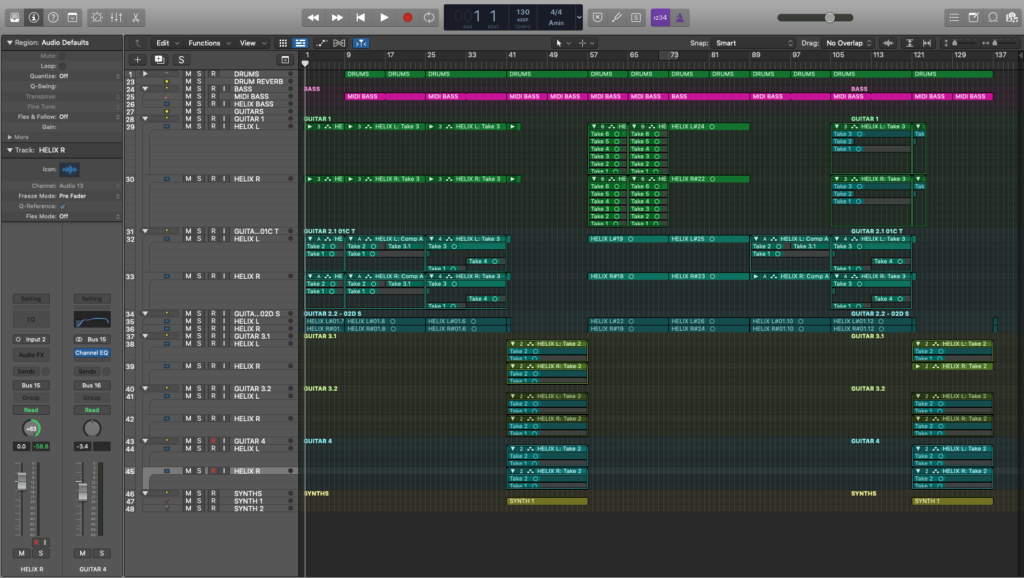
The biggest difference between this particular project and the template is the quantity of guitar parts. The guitar stack has been duplicated a number of times, to a total of 6 guitar parts which are named as follows:
- GUITAR 1
- GUITAR 2 01C T
- GUITAR 2 02D S
- GUITAR 3.1
- GUITAR 3.2
- GUITAR 4
“GUITAR 1” is the lead guitar part, so takes the first spot and is situated uppermost out of the 6 parts.
“GUITAR 2” is split into 2 parts – both being called GUITAR 2 means to me that they are playing the same, or very similar, thing but with tonal difference. Here, the second part of the track name relates to a preset code on the Line 6 Helix, so I know which tone I am using for that part when I come back to it and the T and S relate to which of my guitars is being played for this part. T means Telecaster and S means Stratocaster.
“GUITAR 3” has a similar situation of 2 separate guitars playing the same part, so they are named 3.1 and 3.2, as I haven’t yet made the final decision on tonal aspects of the part.
“GUITAR 4” also lacks detail of which preset and guitar are being used, and this is the last part as it is mostly embellishments and harmonies, not really crucial to the song.
All of these track stacks are also summed into an additional mix bus to adjust the overall level of the guitars in relation to the rest of the mix and add any processing that I want to be consistent across all guitar parts.
Something which I find very useful and if very important to my process is the takes system. I’m not actually sure what Logic calls it but in Pro Tools it is called Playlists. Keeping several guitar takes in the same track makes it extremely easy to go between different takes to listen to variants of parts in order to finalise how the part is played, as well as choosing parts from different takes to make sure I get the best overall performance. This is most useful for recording guitar solos, which I always improvise. This means I can play the solo a number of times without stopping and go back and choose my favourite at a later point.
I hope this has been an interesting read, and do get in touch via twitter, @adamheathmusic or by emailing me – adamheathmusic@outlook.com
Cheers